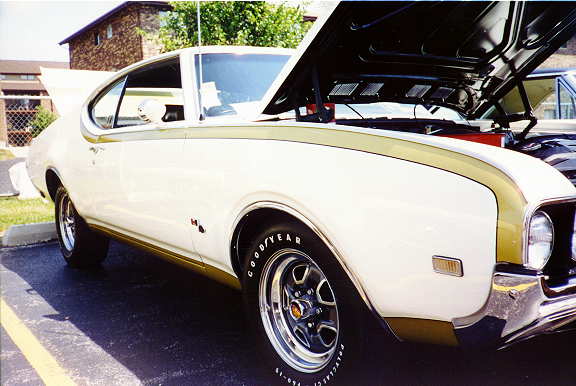
(1969 Hurst/Olds Restoration Link)
(Following are some restoration tips or ideas)
Last Updated:
Last Updated:
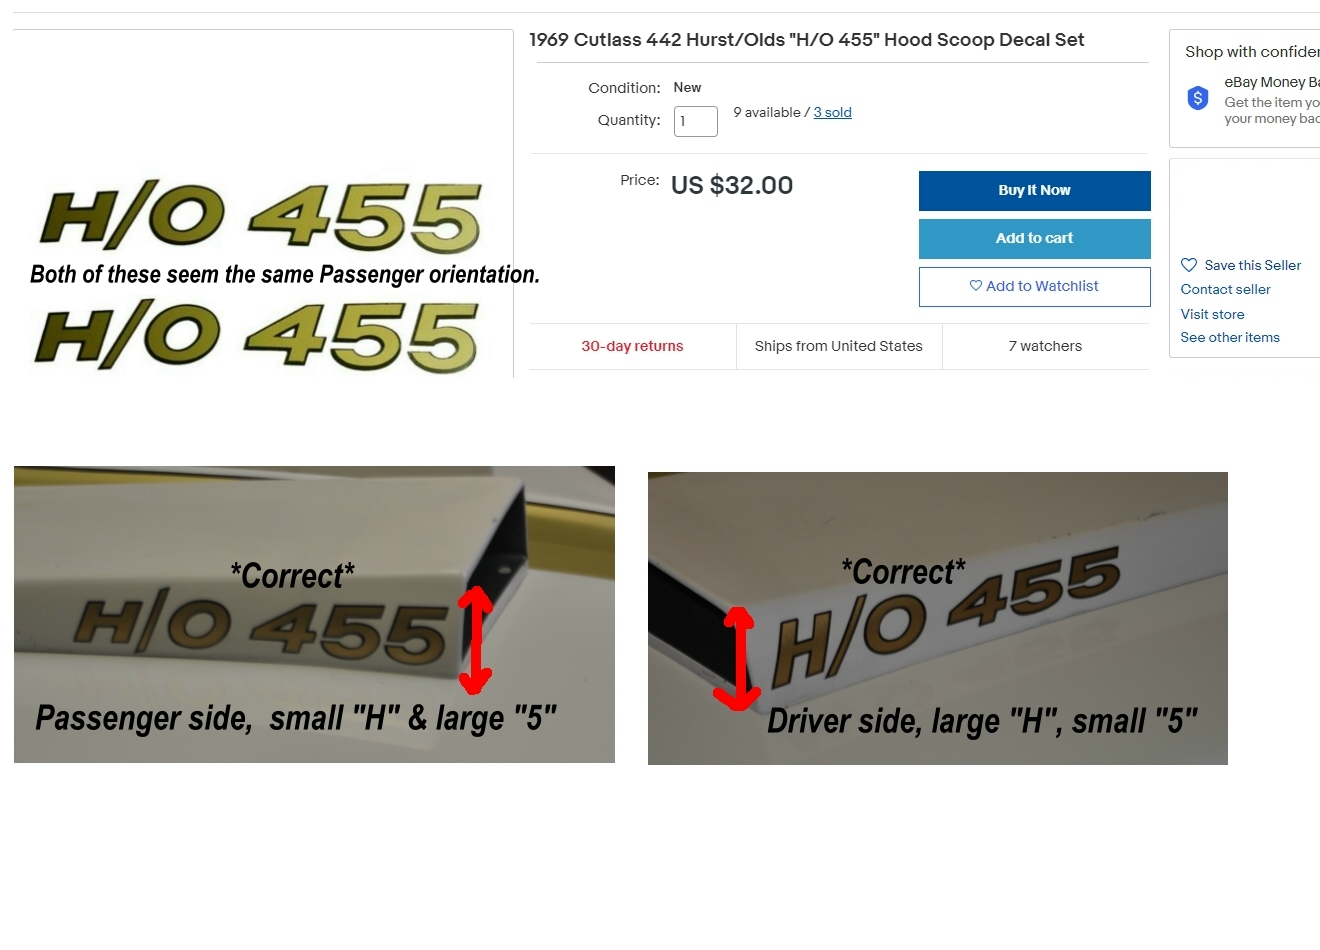
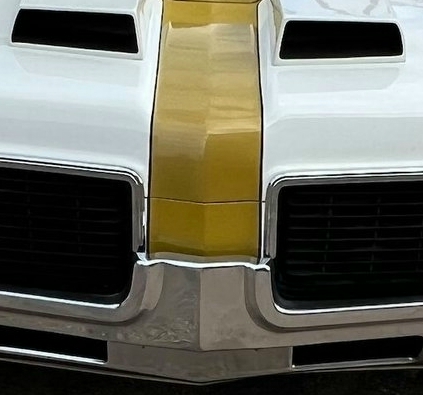
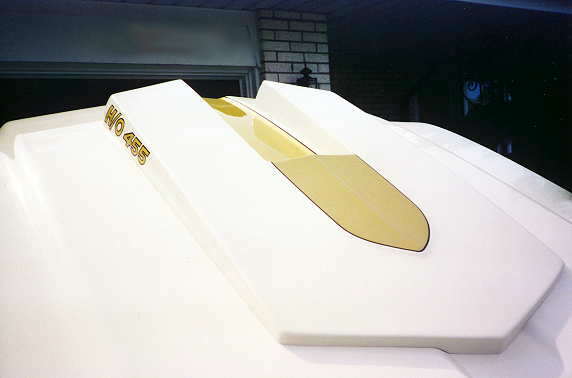
Please be aware... The H/O 455 Hood Scoop decals are DIRECTIONAL. There is a specific Drivers side and Passenger side decal, they will match the angle of the hood scoop itself.
As the scoop grows in size from the rear to the front, so do the decals. The Driver side has a Large "H" at the beginning and ends with a small "5". The Passenger side has a Small
"H" and ends with a Large "5". I've seen freshly restored cars with only one side on both sides and it really sticks out.
See the below picture for an example,
the auction listing is either 'showing' it incorrectly or they are selling 2
'Passenger' side decals. Click for a larger image.
|
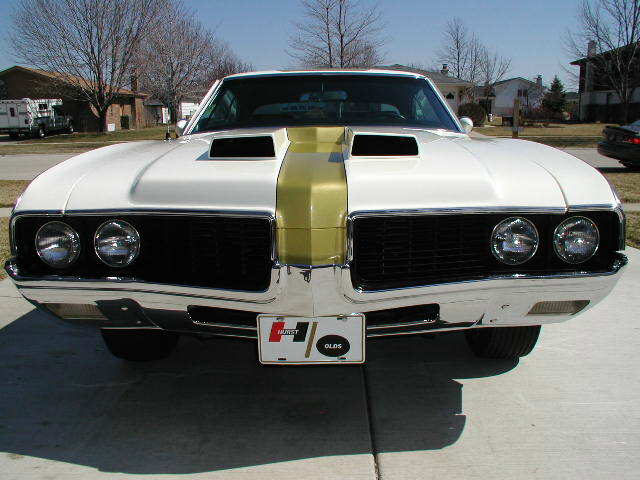
I have an updated striping guide for the 1969 H/O, contact me and I can send it along and pass along some advice.
If you are making a clone, don't bother contacting me... Honestly, 90% if the clones I have seen have half assed paint jobs, plus, why would I want to dilute the uniquness of my car.
I have also seen several fresh re-paints of restored cars that have blatent mistakes which is baffeling as to why someone going that far to buck up the cash for the paint job apparently wouldn't follow through with thier homework.
Even if you do not contact me... PLEASE do your homework, research original cars, go to a National meet and take a boatload of pictures for reference...
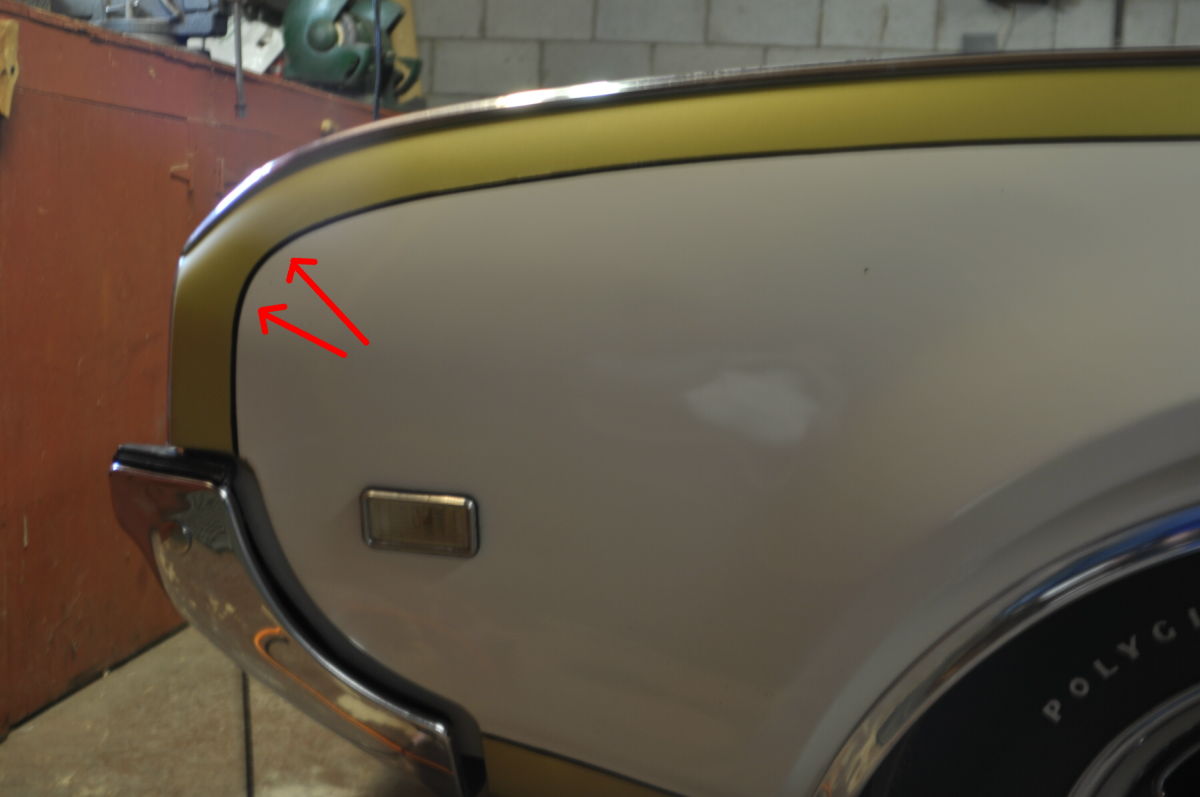
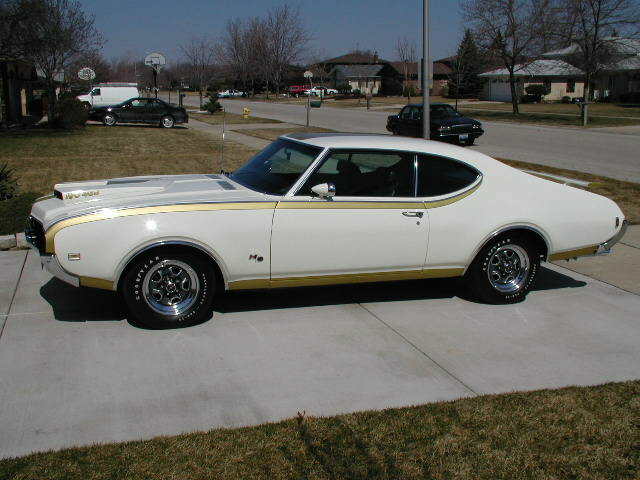
If these are your cars I apologize but the nose stripe was not executed correctly.
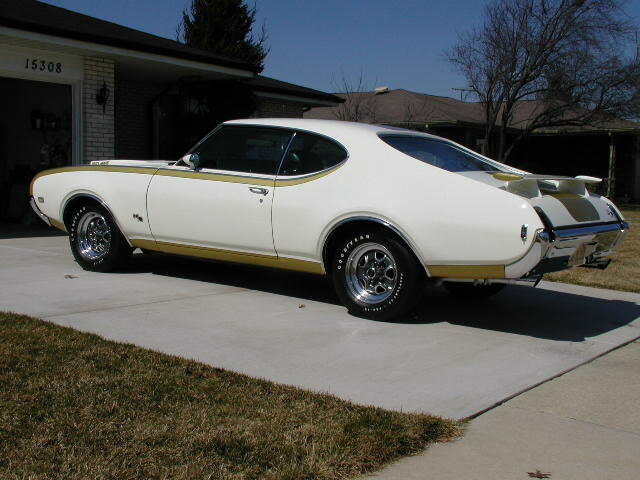
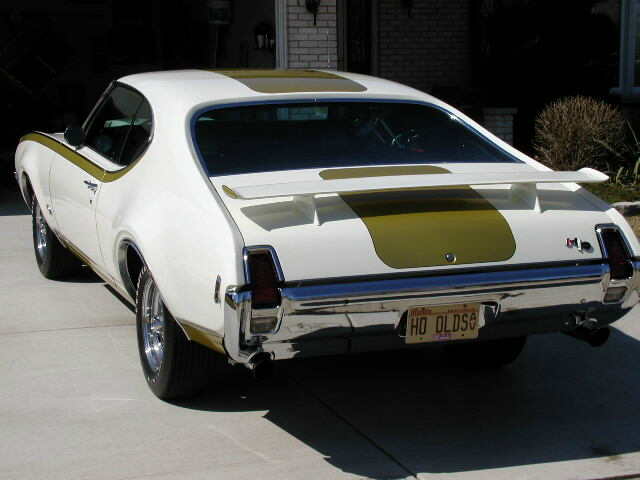
The first exaple below is a correct original paint example, see: [Original Paint & Guide ideas link below].
|
The next examples are unfortunately NOT correct....
|
|
|
|
|
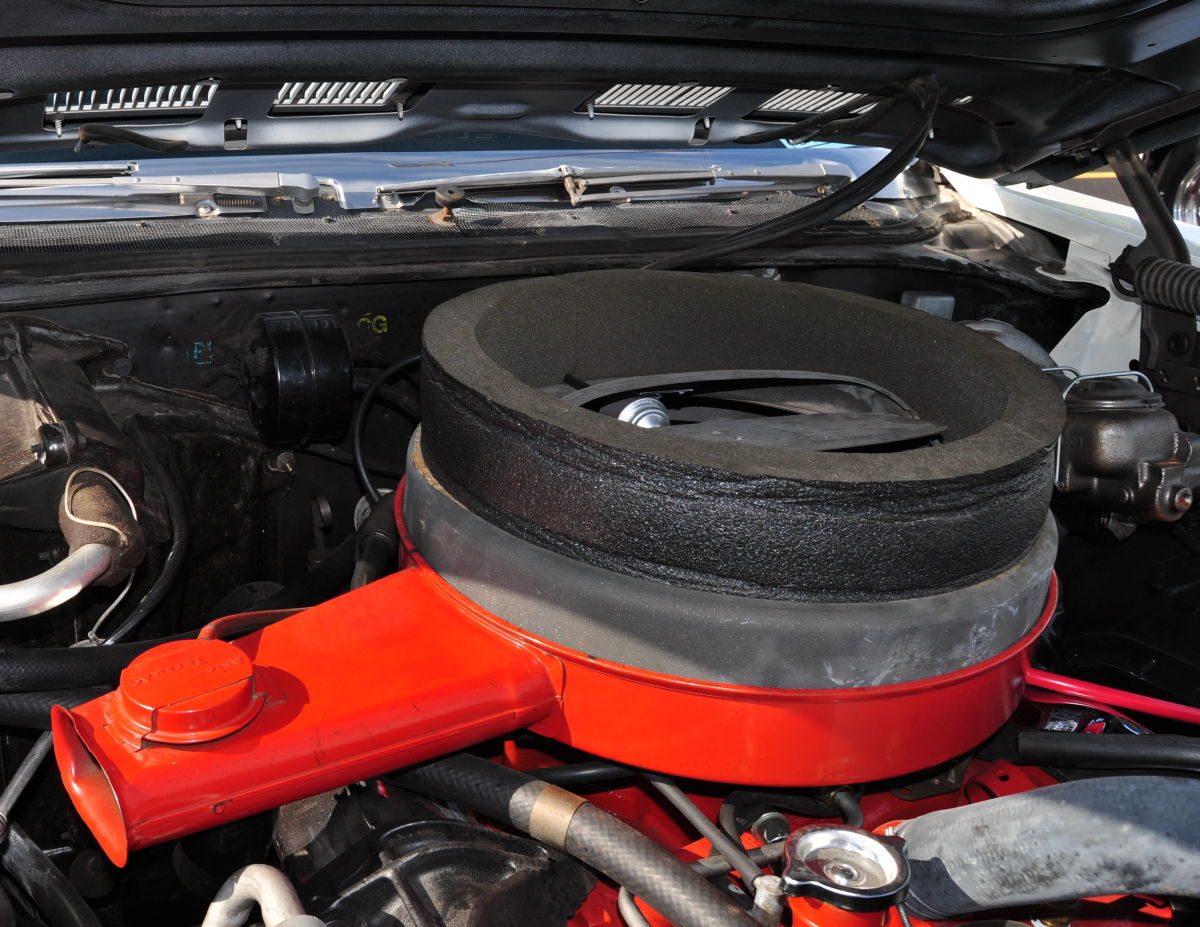
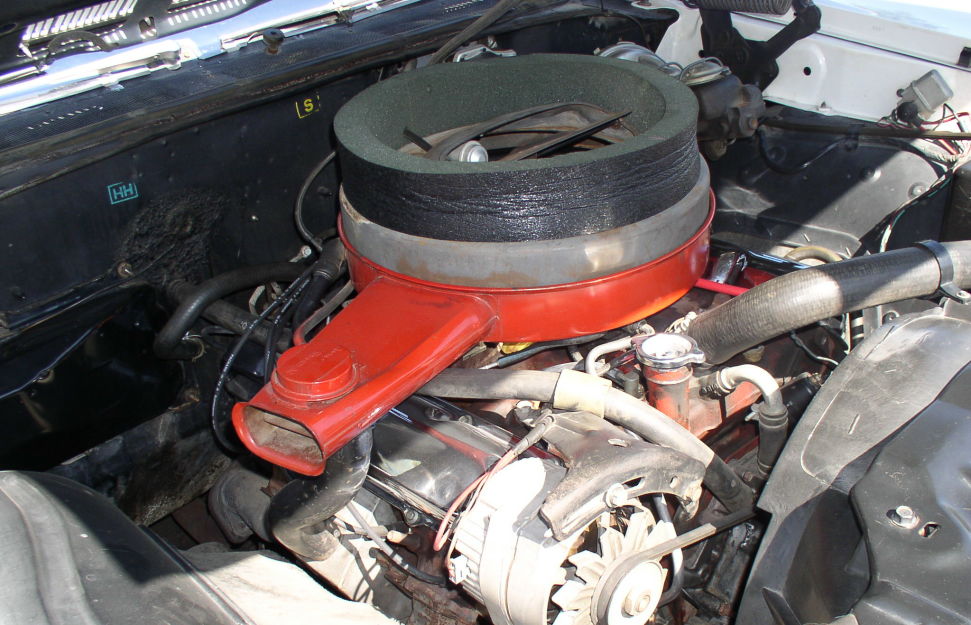
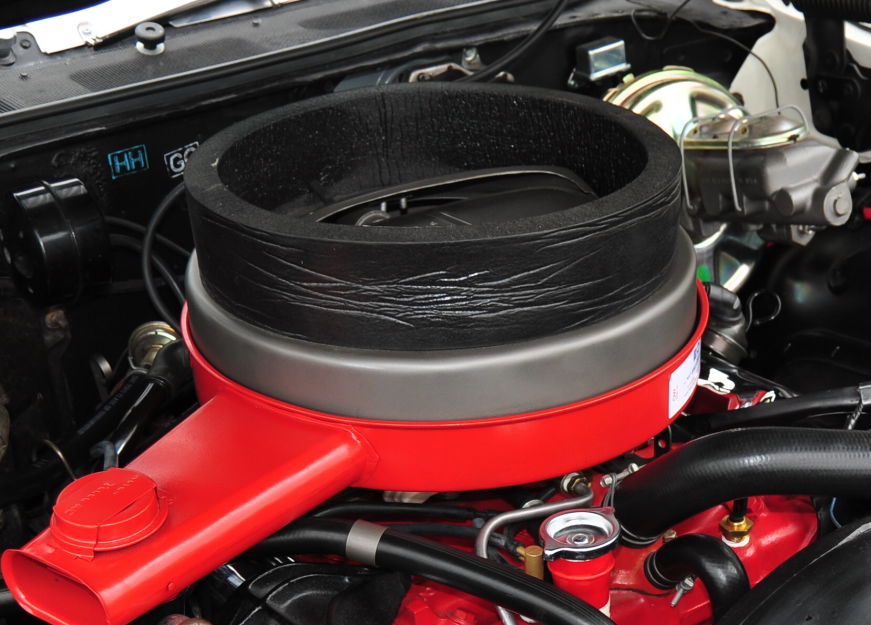
Air Cleaner Top....
They were NOT Flat Black, They were NOT Gloss black, or Red, bla, bla, bla... They were Grey Phosphate plated...
A close substitute to the grey phosphate plating is Seymour Paint - Cast Blast, see last photo for an example.
|
|
|
|
|
Another item on the air cleaner lid under the top can, these indeed did have the semi-circle 'Rocket 455' lid sticker on them. I have heard some say it shouldn't be on there.... sorry... it was.
|
|
|
Below are several links where I have added numerous pictures of unrestored original paint 1969 Hurst/Olds's, there are many interesting flaws and other stuff... I am currently adding new sections, each pertaining to a certain section of the car. Click on the picture or link to go to the appropriate section.
|
|
|
|
|
|
|
|
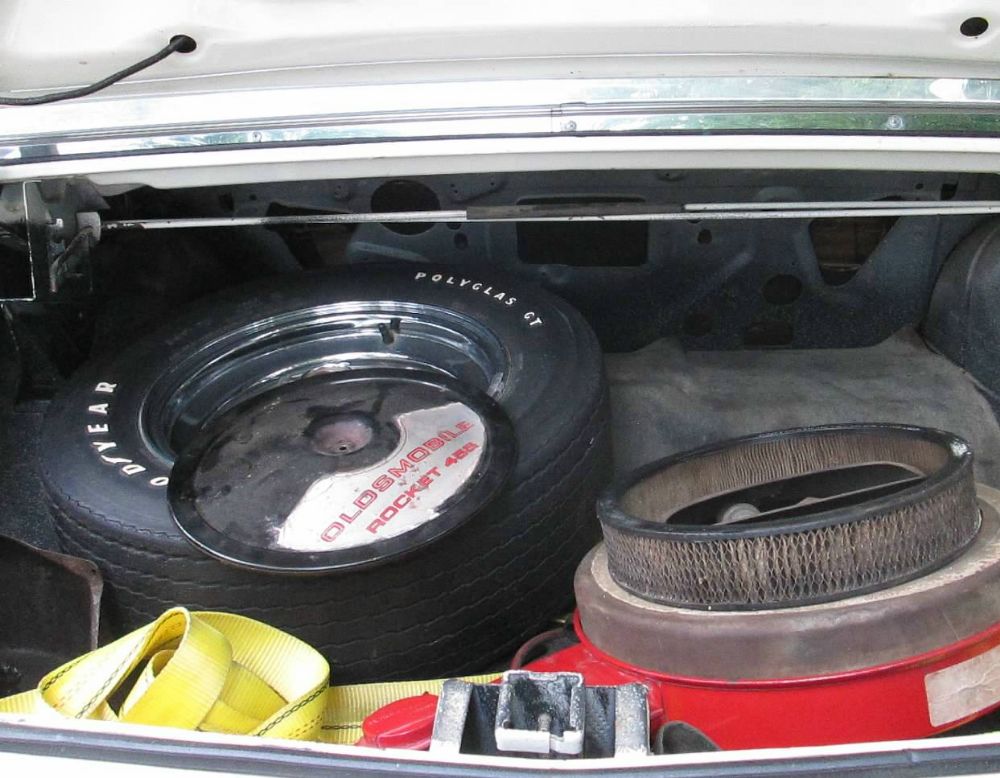
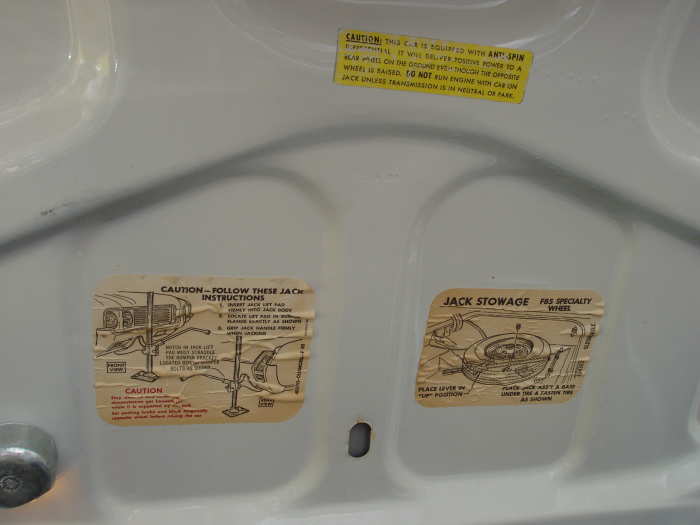
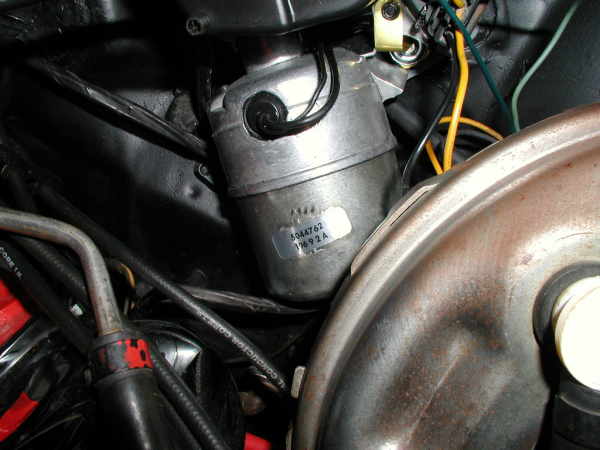
Under Trunk |
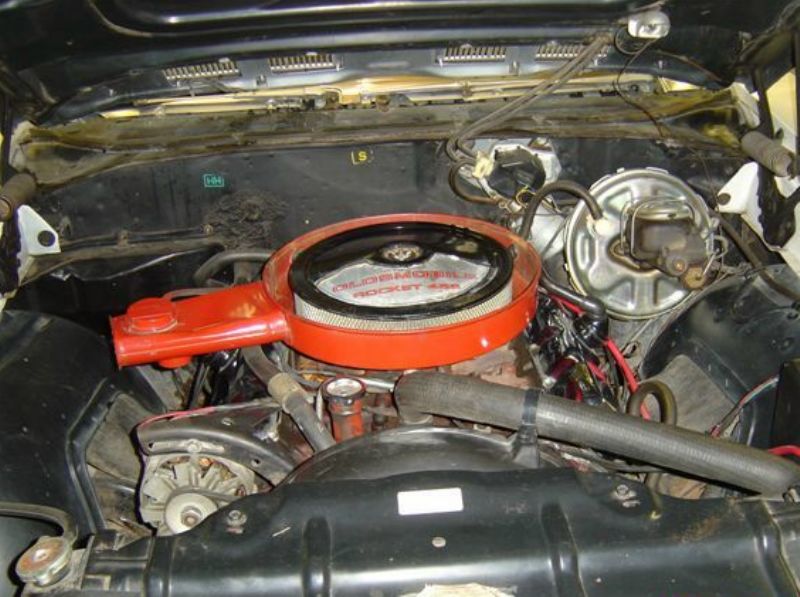
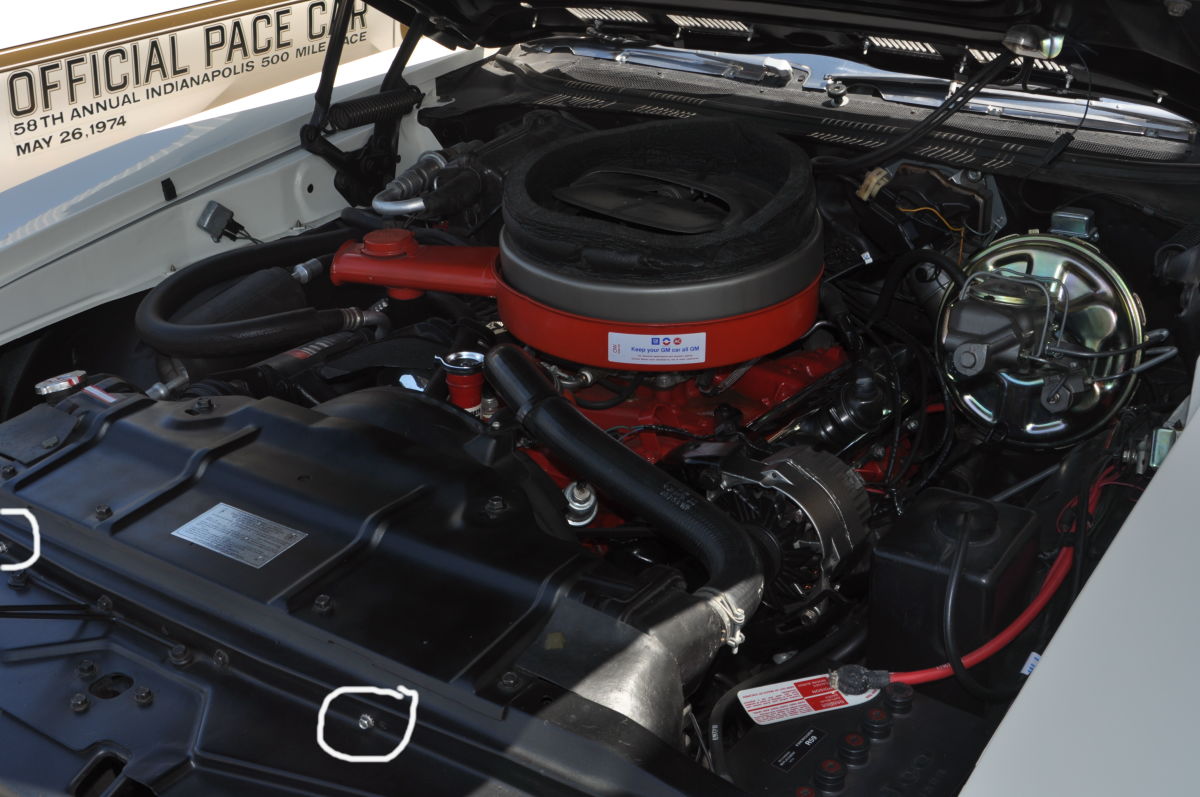
Under Hood |
Firewall/Cowl |
Brake booster |
Lower Alt Bracket |
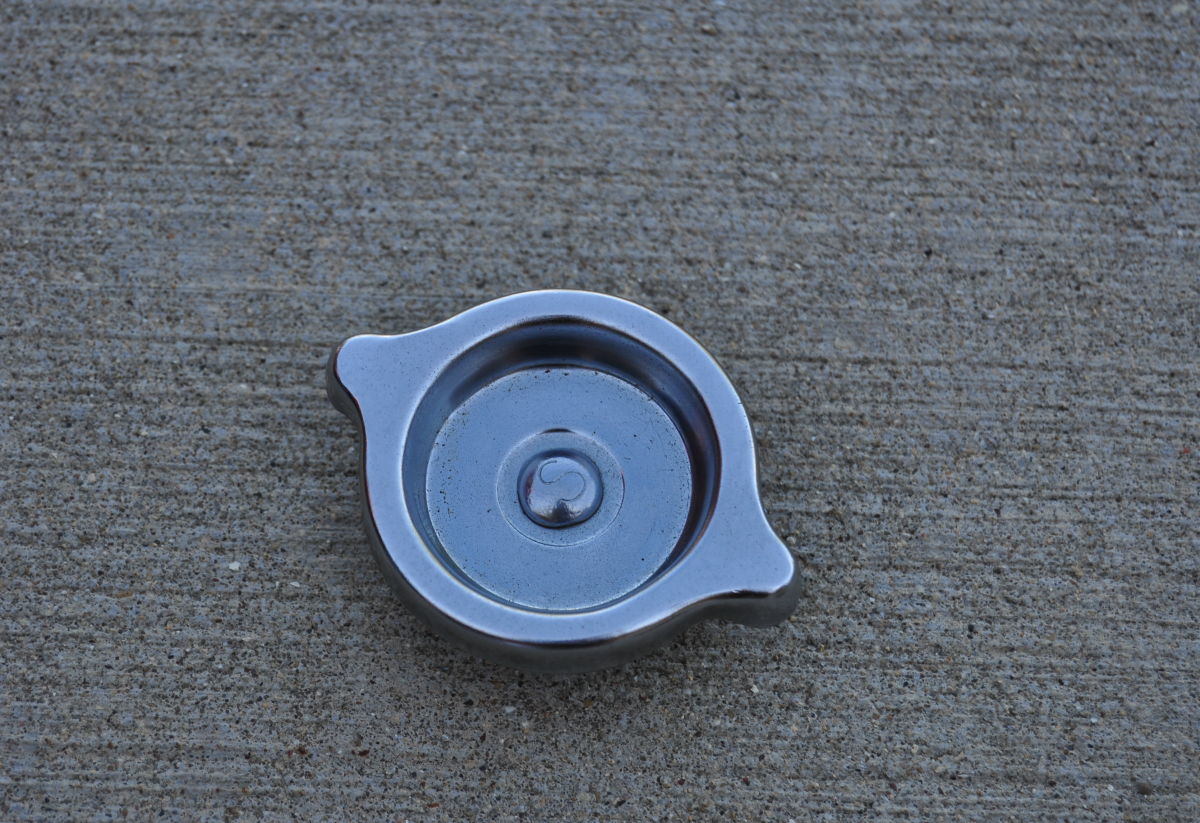
Oil Fill Cap |
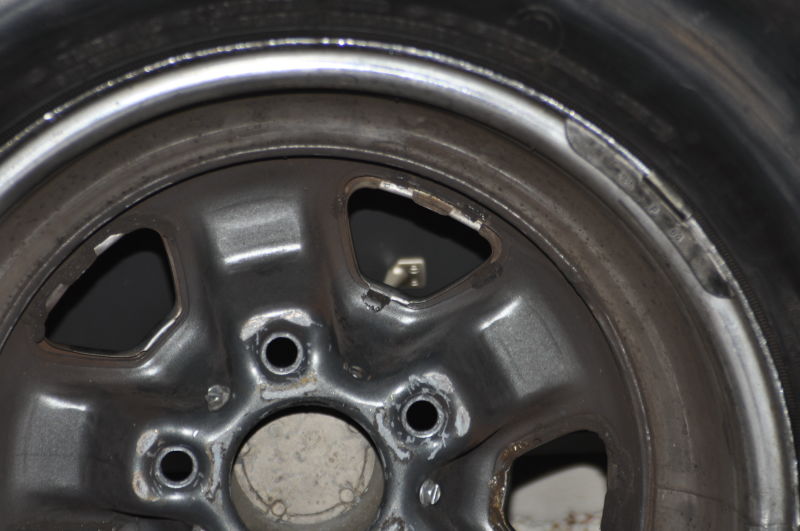
Rims |
Horn Bolts |
|
Original Paint & Guide ideas |
By chance do you have the annoying 'click clack' of loose wheel opening modings.Perhaps one of the three tabs has broken off and it's loose as well. Well, my solution was to take a clear drying household calk and apply it to the underside of the rim and trim peice. The picture on the left is before and the one on the right is after. Note, the calk goes on white and dries to a clear format, works well, holds it in place, no more loose moldings!
|
|
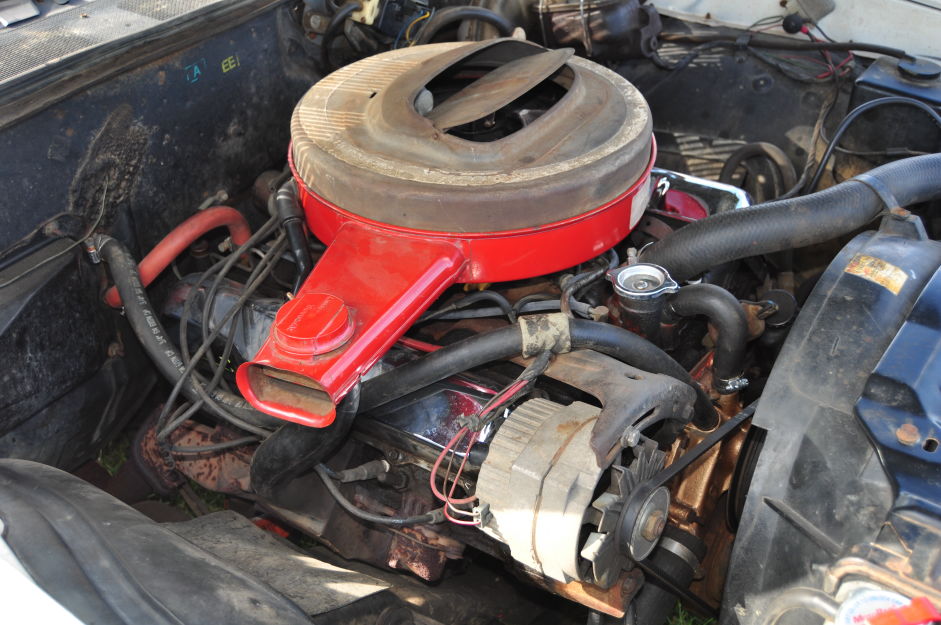
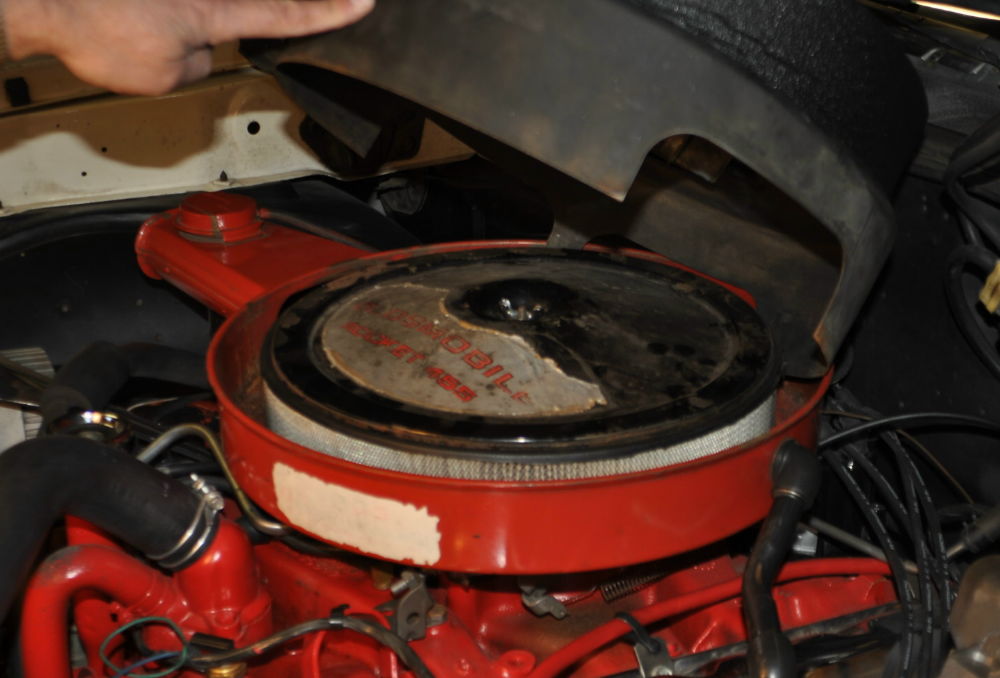
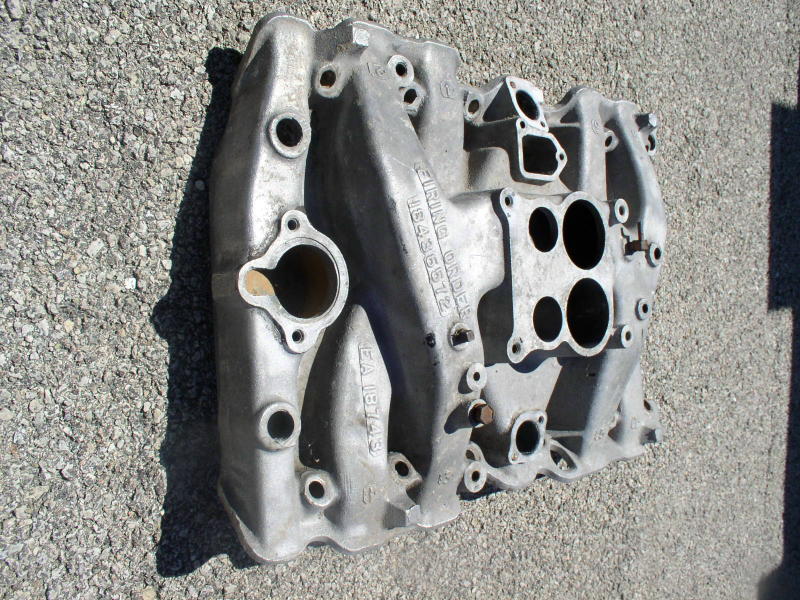
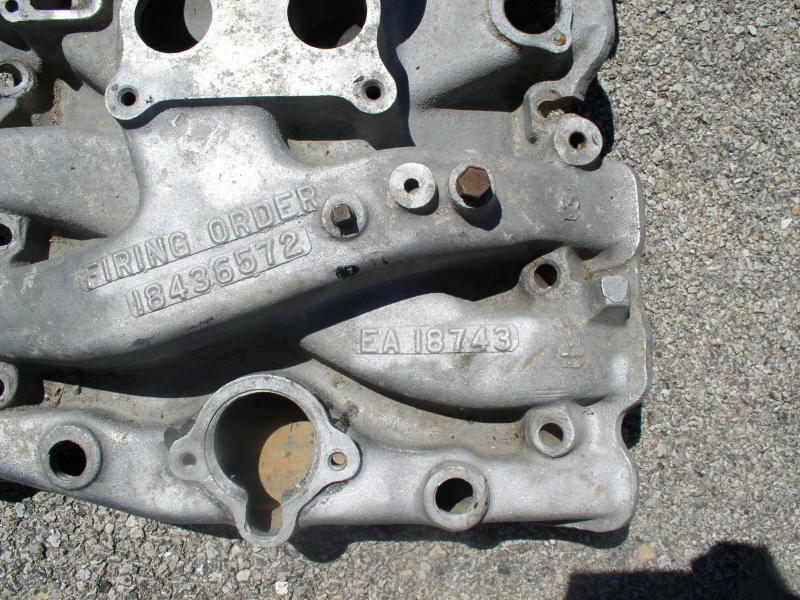
1969 H/O owner Darryl Bauma had the following intake on his car when he bought it years ago.
|
|
|
You may have already tried this... but on restoring the rubber fillers found by the radiator, underneath the radiator and in front of the radiator, try black shoe polish... First, clean the peice with your favorite cleaner, I used Simple Green, then after it is completely dry, rub in some black shoe polish with the applicator brush and it will look brand new.
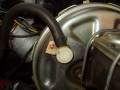
As you may or may not know... the 1969 AMC Hurst Scrambler used the same mirrors as the 1969 H/O and the same flapper door and vaccuum motor on the air cleaner unit. The AMC unit was built into the hood unlike the seperate H/O unit.
It's also been said that the door & vaccuum motor were taken directly from a Ford Cobra Jet unit and used on the 1969 H/O and the AMC. Here is a picture of an OLD Ford unit and the door & motor appear to be the same, so it seems Hurst got them from the same supplier or from Ford for the H/O & AMC. I took these while visiting Karl Sup of AZ from a unit he had in his garage.
Firefrost GoldFellow 1969 Hurst/Olds owner Mike Rothe has come up with the formula via working with DuPont, Demmer Corporation and Kurt Karch. Back in 1998, Mike and Kurt decided the first formulation was a little too green and they ran across Jeff Wurl. Jeff is a fellow 1969 Hurst/Olds owner and a paint and body man. It turns out he had an original Demmer-prepared H/O hood scoop with the original gold paint that has been residing in a box! Using that for comparison, Jeff mixed and sprayed and found the latest formulation using 1/2 the green as the previous is as close as humanly possible in matching the original paint. Jeff pointed out that the slightest change in the green content might change the paint considerably, so make sure the person mixing I have included some shot's of my car with the new Firefrost Gold paint formula, I can't say enough good about it. Mike's link to his paint page is no longer working, but the following link is the correct formulation that was on that page.
I would say if you are considering a re-paint then definitely use this formula, I remember seeing it in the can right after it was mixed and thinking... wow, that's too green.. but it wasn't, the gold really stands out in direct light and it has a greenish hue in indirect lighting. I think the goal is to have 1969 H/O owners to try to use this new formula to give them some sort of standard for the Firefrost. I was at a national meet not too long ago and with over 10 1969 H/O's lined up... no 2 H/O's gold matched!!
|
|
|
|
|
|
|
|
|
|
An individual named Denney Turner is selling reporduction antenna masts for various GM vehicles. I contacted him and was able to find my mast with the correct hex tip. The shiny new antenna adds to the restoration. He can be e-mailed at: nosantennas@aol.com
A company called 'Triple A Enterprises' will make you a reporduction window sticker for your car, and laminate it also if you wish. Provide them with as much detail from your car as you can, as far as color, engine, tranny, options, and original dealer if you can. The can be found at: WWW.WINDOW-STICKER.COM
|
Fellow 1969 H/O owner Ken Millington of California has reproduced the wiper motor sticker, this is his description of it.
"The decal and all datecode #'s came from a 70 W-31 which we took detailed photos of. Ironically the number sequence is 1969 which
is just a coincident. The decal is of original shape and material and as far as I know noboby has duplicated one.
We are asking $3.00 each or 5 for $10.00, price includes postage. I can be e-mailed at kens69hurst@cox.net
. I do believe that they are very close to what was originally on our '69's"
Following is a picture of it and one on my car.
|
|
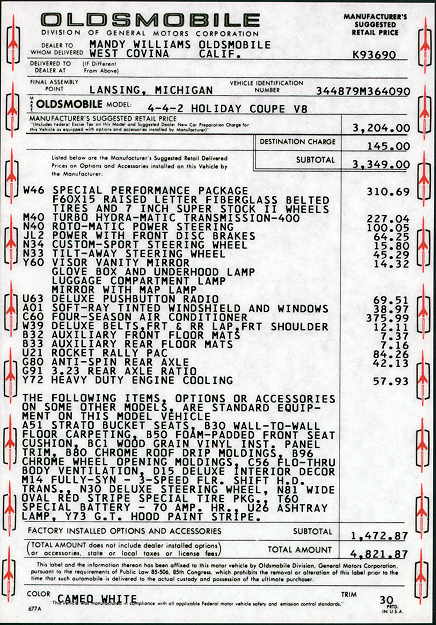
Probably the best $30 investment I made in my car was to by the 1969 Cutlass/442 Assembly Manual. Every part and associated part number is listed in the manual. If you have any question on how somthing on the car is assembled or placed, the answer is probably in this book. There is even a section on the correct placement of the dealer window sticker and new car delivery & break in tags for the interior. It will come in a couple hundred loose leaf pages with 3 hole binder holes punched in them. For the longest time I didn't have this until fellow 1969 Hurst/Olds owner Paul Panczuk convinced me to buy it. I bought mine from Tamraz parts, but most other large supplier should have them, see my parts link for a listing of suppliers, see below for examples....
|
|
|
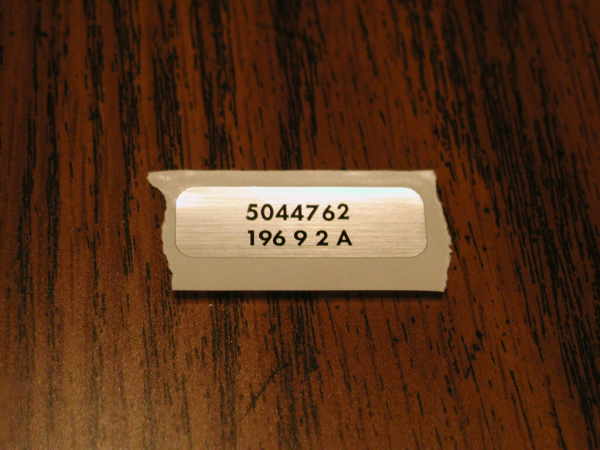
I found my broadcast card stuck in the springs under my rear seat, I have talked to a few other individuals and this is where they found thiers as well, but it is not necissarily in the same place. See my documents section for the broadcast card and it's breakdown.
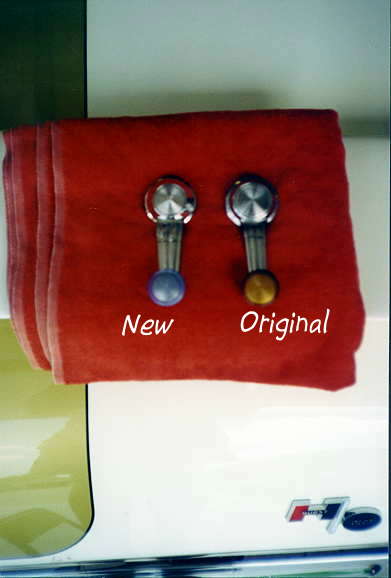
Take a look at your window crank handles, (if you have manual windows), in some cases they will be beat up, have pitting chrome or the knobs will be yellowed with age. Most suppliers will sell them for $20 and up... but, I found a replacement that is as close to an exact match under side by side comparison. They are part of the 'HELP line of car parts, most major auto stores like, Pep boys, Murray's Discount or Trak Auto will carry a line of 'HELP' brand replacement parts. Well thier GM window cranks sell for around $5 to $6 dollars and look the same as the originals. See the below photo for the comparison...
|
From what I can tell from original photographs and from what others have said most underhood bolts/fastners, whether they be for accessory brackets or frame/support bracket bolts were a black oxide in nature. This is a difficult finish to duplicate with paint and the paint will not hold up under wrenching. Not too long ago I bought a bench grinder for around $40 and wire wheel.. so I've been cleaning up some original bolts and have grabbed some from junk yards and cleaned them. Next I have recently bought a black metal oxide plating system from Eastwood but I have not used it yet... I'll let you know how they turn out.
For the longest time I wanted to replace my rear package tray as it had become faded with age. I bought mine from Brothers Automotive Products, but most other major restoration places will carry them. You will need to take out the back seat, upper and lower and the 2 side panels as they sort of hold the rear tray in at some points. I found it to not really be a problem, it just took some time to accomplish. The replacement fit just fine but there is a underlayment that on my original deteriorated in my hands, there was one offered but I did not buy it. I ended up going to the local fabric store and buying some black felt like material and that worked just as well. The front edge of the new package tray is a vinyl like material that will need to be glued down to the front edge of the frame support of the rear seat. Then the rear seat will butt up against it. The problem is the vinyl material needs to be brought over the package tray and glued to this support, but it won't stay as you need a fast acting glue. So I bought some contact cement/rubber cement.... the kind you spread on each surface, let dry, then put together.... this works just fine but be careful as when you place them together they will immedeatly bond!
Many restoration places sell the reproduction Delco group 24 batteries from around $150.00 and up, but there is a GM restoration part that is a dummy top that will fit over your current/modern group 24 battery. It has 2 holes for the posts and it will just slip on top of your present battery and it will make it look very close to a Delco reproduction battery. I found that the Paddock carries these dummy tops for around $40.
The Paddock & others carry a repro headrest button/unit, 4 needed per car... it's the chromed oval unit at the top of the seat that the
headrest posts pass thru. Well the repro unit has the button facing outward in order to lock the headrests and the original the release buttons face inward
so they cannot be seen when the headrest is down, also the button is the incorrect shape and larger than the originals. I was going to return the 4 I bought, but I found I could seperate the upper/outer chromed shell of
the new unit from the rest of it's plastic body. Then with very little modification, they replaced the older/original covers almost exactly. If you
cannot find an exact replacement, this may be the route to go...